Creating Hula Hideouts | Learning at Play
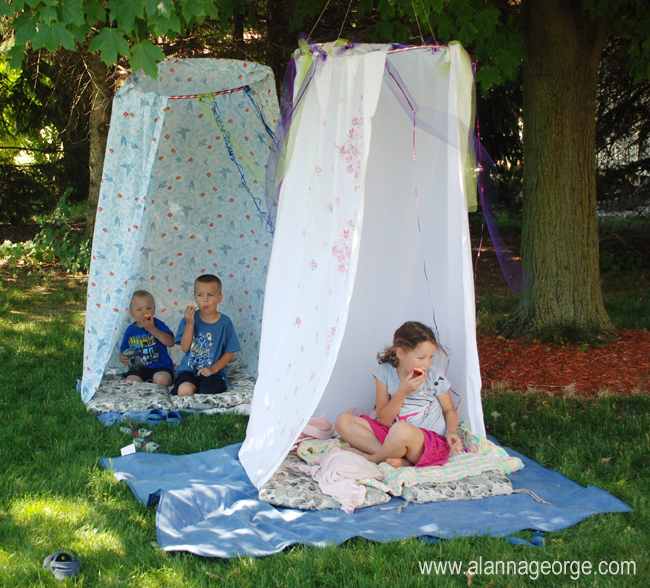
This week the sun has finally re-emerged! The bikes and scooters all made their way to the parking lot and the kids were looking for some easy fort projects. We we so excited when we found this “recipe” for Hula Hideouts over at AlannaGeorge.com! The kids can’t wait to get started on them.

Supplies:
- Hula Hoop (Alanna found hers at Dollar Tree for $1 each)
- Safety Pins
- Twine or Rope
- Tulle and/or Ribbon (she used Jo-Anns Dollar bin ribbon)
- Sheets (I bet the Goodwill has some)
- Scissors (that actually cut fabric)
- Cushions and Blankets
How To:
- Pin the top edge of the sheet to the hula hoop by folding the sheet over and pinning it to itself.
- Use twine to create a hanger to tie your hideout to the tree with. I used two long pieces of twine and tied each piece to opposite sides of the hula hoop. The two pieces then criss-crossed over each other. She tied the two together where they criss-crossed with another piece of twine. Later she used that piece to actually tie the hoop into the tree.
- Tie on tulle and ribbons or any other embellishments you have.
- Hang the hideout from a tree branch (or… we might find a way to hang them from the theater ceiling :).
- Add blankets and cushions underneath your fort so you can be nice and comfy.
- Take a little nap or eat a snack inside your new hula hideout.
Doesn’t this sound fun?! We can’t wait to get started. We’ve already scrounged a bit of rope and we have a couple cushions we can use, but we need more and we need everything else. We’ll be on the hunt to gather supplies. Hopefully, over the weekend we’ll turn up enough to get at least a couple hula hideouts made next week and enjoy the last few days of sun before the next storm rolls in.
Many thanks to Alanna for the idea, photo and instructions. Happy play-learning!